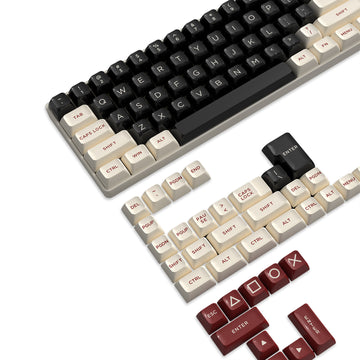



South-facing and north-facing describe which way a switch's LED cutout points on the keyboard's PCB, and that direction can affect whether a Cherry-profile keycap clears the switch housing. North-facing lets more light reach the top of a keycap for brighter legends, but it also raises the chance that a Cherry-profile cap's underside meets the switch housing before the key fully bottoms out.
The safest way to know your exact board is to check PCB orientation, inspect your keycap's underside shape, and test one key before buying a full set. Orientation alone is a screening clue, not a compatibility guarantee.
Key Takeaways
- South-facing and north-facing name the direction a switch's LED position faces on the PCB, not a switch category.
- North-facing layouts can favor brighter top-legend lighting; south-facing layouts generally carry a lower reported risk of Cherry-profile keycap interference.
- Interference is a physical contact issue between the keycap underside and the switch's top housing, and it can vary by row, profile, and switch design.
- Test one representative keycap and switch before buying a full set whenever you lack documented proof of fit.
- Treat any rubbing, scraping, or incomplete key travel as a signal to stop and re-check that specific row or keycap, not the whole board.
How to Check Keycap Interference Before You Buy
The fastest way to screen for interference is a short, ordered check that ends in one of three decisions: buy, test first, or don't assume yet.
- Identify your PCB's switch orientation by removing one keycap and looking at where the LED cutout or normal LED position sits on the switch.
- Identify your keycap's profile and underside shape, since Cherry-profile caps have a lower, more angled underside that leaves less room around the switch housing than OEM, SA, or DSA profiles.
- Test one representative keycap on the switch you're most concerned about, pressing it through full travel to feel for rubbing, scraping, or a stop before normal bottom-out.
- Confirm with the seller's exact product documentation when you need certainty for a full set, since a single test key only tells you about that row and switch.
If the test key seats cleanly and travels fully, you can reasonably proceed with that keycap set on that board. If you can't test in advance, treat the purchase as test-first once the first key arrives rather than committing to the whole set. If you feel rubbing or a hard stop, don't assume the rest of the set will behave the same way; stop and reassess that specific row.
What South-Facing and North-Facing Mean
North-facing means the switch's LED position faces the top edge of the keyboard, toward the number row; south-facing means it faces the bottom edge, toward the spacebar and the typist. You can inspect switch LED orientation by popping off a keycap and looking at where the small LED opening sits on the switch housing.

This direction is set by the PCB's pad layout, not by the switch itself, so the same switch model can be installed either way depending on the board.
| Orientation | LED position | Cherry-profile clearance tendency | Top-legend lighting tendency |
|---|---|---|---|
| North-facing | Toward top edge/number row | Higher reported interference risk | Generally brighter legend shine-through |
| South-facing | Toward bottom edge/spacebar | Generally lower reported interference risk | Less legend shine-through |
These tendencies describe patterns reported across many boards and keycap sets, not a guarantee for your exact combination.
Why North-Facing Can Cause Physical Interference
Interference happens when a keycap's inner wall touches the switch's top housing before the stem finishes its normal travel, cutting the keypress short or creating a scraping feel. Cherry-profile keycaps use a lower, more sculpted underside than OEM or SA profiles, which leaves less clearance around the switch's LED cutout when that cutout faces north.
Because the exact contact point depends on the keycap's underside shape, the switch housing's design, and manufacturing tolerances, the outcome can vary row by row on the same board. Community reports on the conditional Cherry-profile interference risk describe certain rows, often the number row and modifier keys, contacting the housing more often than others, while some newer switch housings are shaped to reduce the issue. A north-facing label tells you a risk is possible, not that every key on that layout will fail.
Clearance vs. Backlit Legend Visibility
When physical fit and legend lighting point toward different orientations, decide which requirement would cause more regret if ignored, then verify the exact combination before buying a full set.
When Physical Clearance Comes First
If you're set on Cherry-profile keycaps, start by favoring a south-facing board, since it generally carries a lower reported risk of the underside-to-housing contact discussed above. That preference is a starting screen, not a guarantee, so still test the exact keycap and switch pairing you plan to use, especially on rows you haven't tried.
When Backlit Legends Come First
If bright, even top-legend lighting matters more to you than sculpted profiles, a north-facing layout can be the better fit, since the top-legend shine-through tendency tends to favor that orientation. Legend brightness and physical clearance are separate questions, so a board that lights up well can still need a fit check if you plan to use Cherry-profile caps on it. When both requirements matter to you, test one key or get exact product facts before ordering a full set.
Cherry-Profile Keycap Compatibility: Make the Final Call
Cherry-profile compatibility depends on the exact keyboard, PCB, switch housing, and affected row, so no single orientation label settles the question by itself.
If You Are Choosing Cherry-Profile Keycaps
Treat a south-facing board as a lower-risk starting point, not a promise of a perfect fit, and treat a north-facing board as a situation that calls for testing before you commit to a full set. Row-specific exceptions are common enough that a cap that fits on one row may not fit identically on another with a different switch or housing. Browsing our keycap collection can help you compare available profiles once you know what your board's orientation and clearance testing showed.
The Final Verification Rule
- Documented exact fit: proceed with that keycap set on that board within the documented scope.
- No documented fit evidence: test one representative keycap and switch combination before buying the full set.
- Rubbing or incomplete key travel on any key: stop treating the set as confirmed compatible and reassess that specific row or housing.
FAQs
How do I check switch orientation if documentation is missing?
Remove a single keycap and inspect the position of the LED opening on the switch housing: pointing toward the top edge or number row indicates north-facing, while pointing toward the spacebar indicates south-facing. If the LED cutout is obscured or unreadable, check the manufacturer's exact PCB specifications or test a single keycap before assuming fit.
What should I do if a replacement keycap rubs or stops short?
Stop pressing that key and remove the cap to inspect where it contacts the switch housing. Compare that exact row, switch housing, and keycap underside against a row that works fine before deciding whether the rest of the set needs a different profile or a different board.
Can switch housing shapes prevent keycap interference on north-facing boards?
Some newer mechanical switches feature modified top housings designed to create extra clearance for lower keycap walls even on north-facing PCBs. Because tolerances and row geometries vary, you should still test a sample switch with your specific keycaps rather than assuming all switch types will clear.